
All Users
The All Users section displays the functionality that allows administrators or authorized users to view and manage all the users registered within the system.
Following are the actions or information that the all user feature provides:
Add User
Import Users
Export Users
Show deactivated users
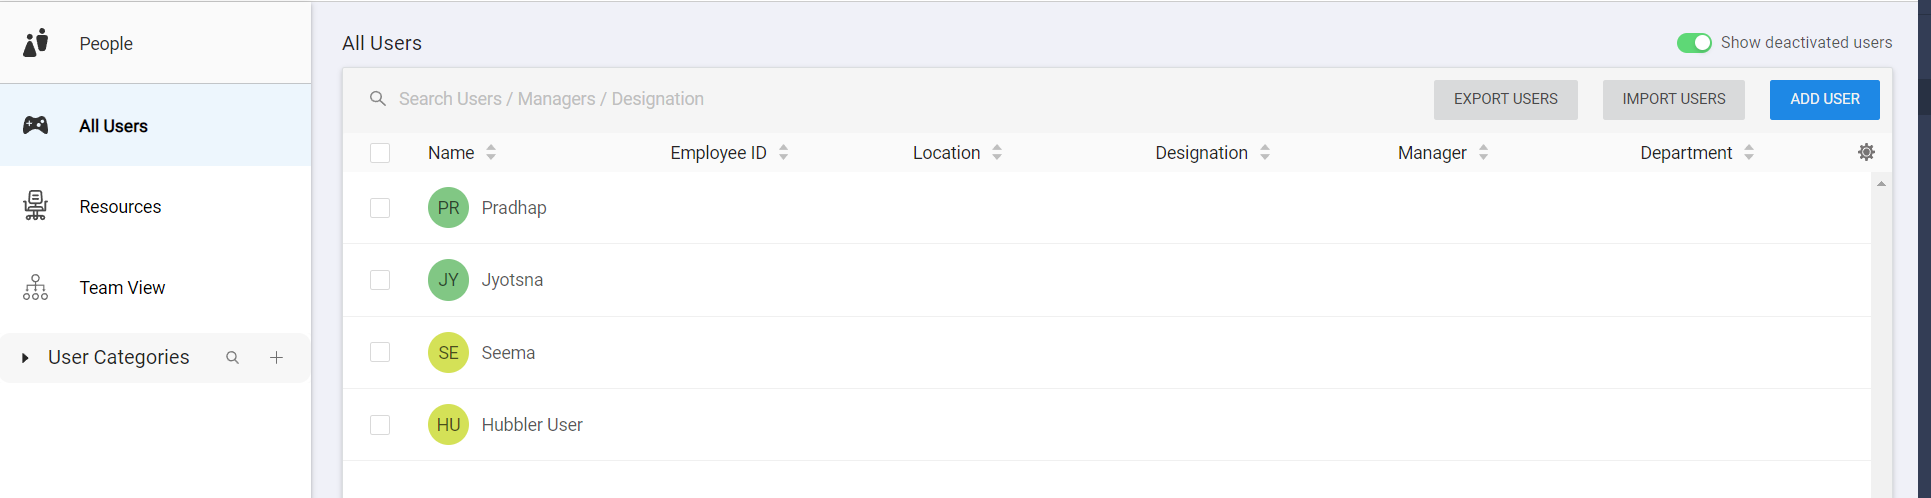
The gear icon helps in managing the columns displayed in the All Users window.
The populated window is divided into two sections:
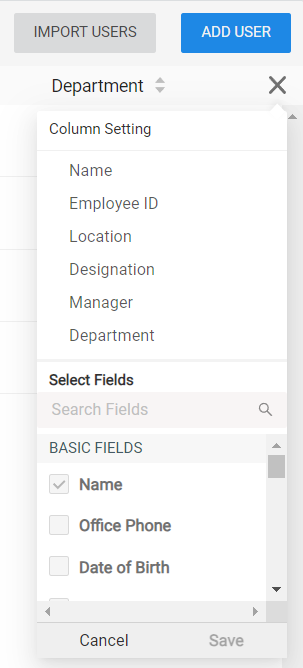
Column Settings - Displays the list of column fields selected to be displayed.
Select Fields - Displays the list of additional options that can be selected to be displayed.
Steps to modify the displayed columns:
Click on the settings icon.
Under the "Column Settings", delete the field that is not required using the cross icon.
Choose the necessary field by selecting the checkbox under the "Select Fields" section.
Click Save to confirm the changes.
Manage Users
From the All Users window, users can be deactivated, deleted, and edited. Simply select the user and choose the corresponding management option.

Deactivate User
This option helps in disabling the users who are no longer active in the system.
Steps:
Select the user by clicking on the user's check box.
Click on the deactivate user icon.
All deactivated users can be visible by using the "Show deactivated users" toggle on the top left corner of the screen.
Delete User
This option helps in deleting the user details from the system.
Steps:
Select the user by clicking on the user's check box.
Click on the delete icon on the top left corner of the console.
The organizational hierarchy needs to be maintained before deleting a user.
Edit User
This option helps in modifying the details of an existing user.
Steps:
Select the user by clicking on the user's check box.
Click on the edit icon on the top left corner of the console.
Last updated