
Special Fields
Special fields provide advanced functionality and specialized features for creating custom applications. These fields go beyond basic data input and storage, offering capabilities such as making composite fields, adding repetitive date, adding formulas, QR code scanning, and more. Special Fields in Hubler enhance the versatility and interactivity of applications, allowing users to incorporate specific functionalities tailored to their unique business requirements within the Hubler platform.
Composite
Provide a consolidated approach to managing related data by combining multiple fields into one, promoting organization and efficiency.

Field Properties
Field Name: Used to assign a name to the field.
Fields to be Displayed: Specifies the fields to be shown for a Composite field.
Visibility Settings
Enable Visibility Settings: Enables the ability to show or hide conditions that are configured using the gear icon. To learn more, click here.
Repeating
Enable the input of multiple values within a single field, simplifying the capture of repetitive data, such as multiple work experiences.
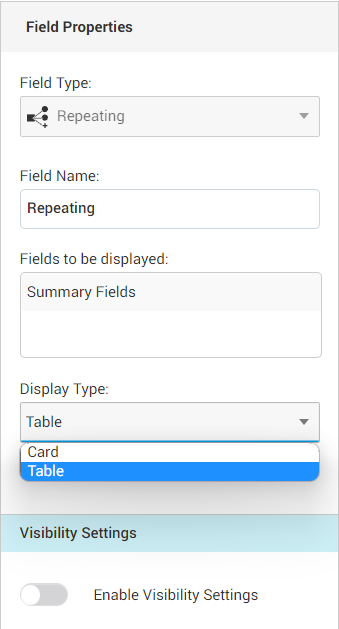
Field Properties
Field Name: Used to assign a name to the field.
Fields to be Displayed: Specifies the fields to be shown for a Composite field.
Display Type: Defines the way the repetitive fields are displayed, either as a table or as cards.
Visibility Settings
Enable Visibility Settings: Enables the ability to show or hide conditions that are configured using the gear icon. To learn more, click here.

Date-fetch
Retrieves data from other app stages and displays it, enabling the selection of a source stage and specifying the desired details to fetch.
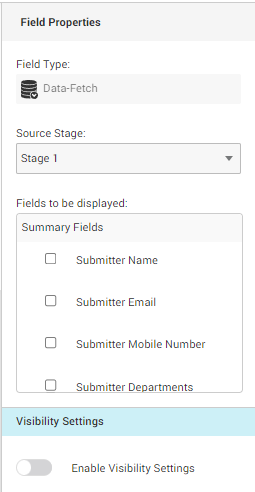
Field Properties
Source Stage: Fetches data from other stages within the same app.
Fields to be Displayed: Lists the field names from the fetched stage that will be displayed.
Visibility Settings
Enable Visibility Settings: Enables the ability to show or hide conditions that are configured using the gear icon. To learn more, click here.

Formula
Empower users to create formulas for performing calculations on metrics, facilitating tasks such as calculating item prices based on quantity.
Field Properties
Field Name: Used to define the name of the field.
Formula: Allows you to generate formulas that can be implemented on the metrics.
Round off the formula to: Defines the round off value to be used in the formula.
Visibility Settings
Enable Visibility Settings: Enables the ability to show or hide conditions that are configured using the gear icon. To learn more, click here.

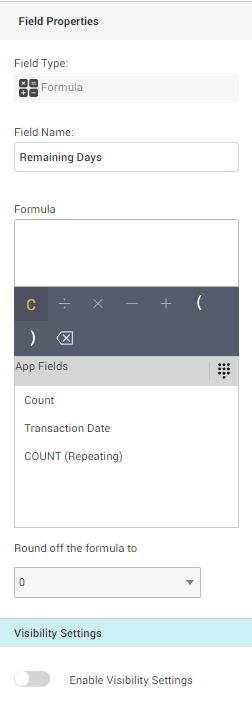
Formula On The Fly
Enables dynamic formula creation for real-time calculations, which is useful for determining metrics like the remaining days in a contract or trial period.
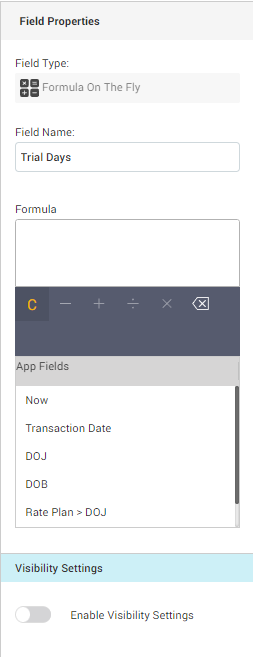
Field Properties
Field Name: Used to define the name of the field.
Formula: Specifies the formula to be executed.
App Fields: Enables the addition of the formula to other app fields such as Transaction date, DOJ, DOB, etc.
Visibility Settings
Enable Visibility Settings: Enables the ability to show or hide conditions that are configured using the gear icon. To learn more, click here.

Rating
Enables the assignment of star ratings and comments for items, facilitating user feedback and evaluation.
Note that this feature is only available for iOS and macOS.
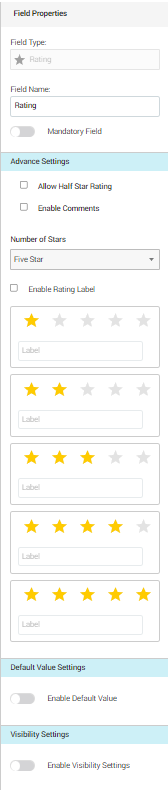
Field Properties:
Field Name: Used to assign a name to the field.
Mandatory field: Ensures that adding a value in the field is mandatory.
Advance Settings:
Allow Half Star Rating (Checkbox): Enables the option to give half star ratings.
Enable Comments (Checkbox): Enables the option to add comments.
Default Value Setting
Enable Default Values: Allows the definition of default values for the field.
Visibility Settings
Enable Visibility Settings: Enables the ability to show or hide conditions that are configured using the gear icon. To learn more, click here.

Booking
Facilitates the creation of appointments, reservations, or resource scheduling by selecting options such as date, duration, and resources.
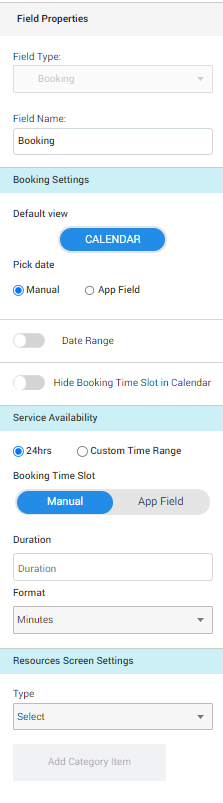
Field Properties:
Field Name: Used to assign a name to the field.
Booking Settings:
Default View: Manages the default view of the page by clicking on the CALENDAR option.
Pick Date: Allows manual selection of the date or selection based on the field in the app.
Date Range (Checkbox): Enables the option to select a date range.
Hide Booking Time Slot in Calendar (Checkbox): Enables the option to hide the booking time slot in the calendar.
Service Availability
24-hour: Enables the availability of the service in the 24-hour format.
Custom Time Range: Enables the availability of the service for a custom time range.
Booking Time Slot: Allows manual selection or selection based on a field in the app for the booking slot.
Duration: Specifies the duration for each booking slot.
Format: Specifies the time format in minutes and hours.
Resources Screen Settings: Allows the availability of the booking to be based on the availability of resources.
Resource Type: Allows you to specify the type of resources available for booking.
Add Category Item: Enables you to categorize the resources based on their type.
Auto Increment
Automatically generate unique IDs, which are valuable in scenarios where job IDs need to be generated automatically. These fields offer the flexibility to customize prefixes, start values, and intervals for generating IDs.
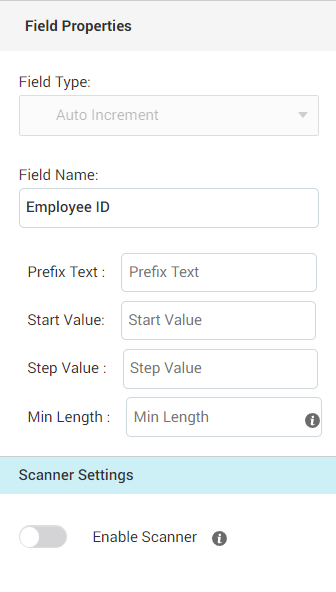
Field Properties:
Field Name: Used to assign a name to the field.
Prefix text: Specify a unique prefix value to be included in the generated IDs.
Start value: Set the initial value for the series of IDs.
Step value: Define the interval between consecutive IDs in the series.
Minimum length: Determine the minimum required length for the field.
Scanner Settings:
Enable Scanner - Activates the feature that allows QR or barcode scanning functionality.
QR Code
This field generates QR codes that can be scanned to retrieve specific information or perform actions, enhancing data retrieval and interactivity.
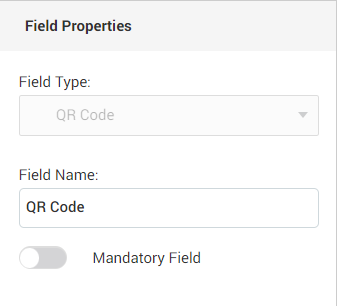
Field Properties:
Field Name: Used to assign a name to the field.
Mandatory Field: Ensures that a value must be added to the field.
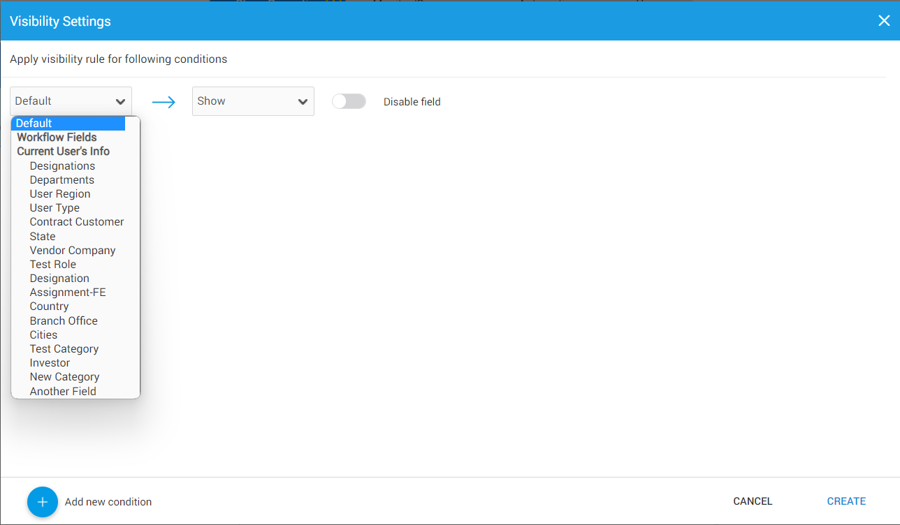
Visibility Settings
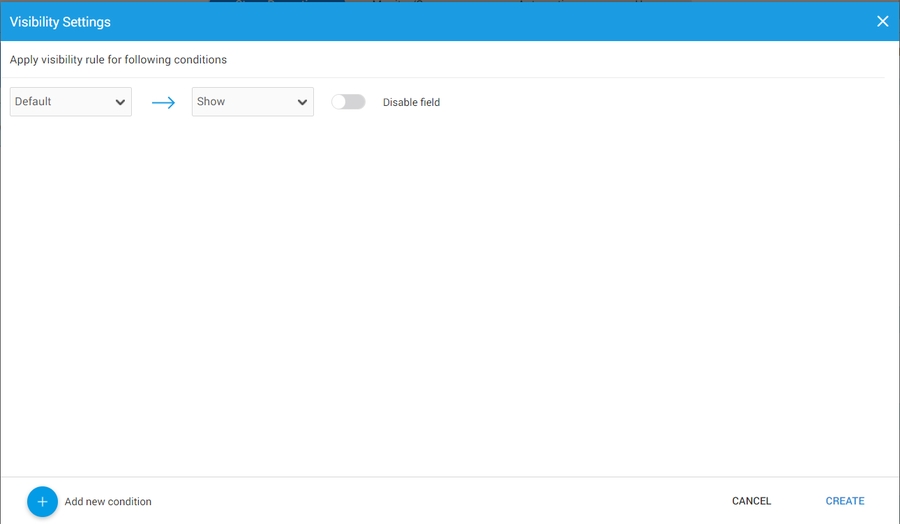
Visibility Settings allow users to configure conditions and criteria for showing or hiding specific elements within an application. With Visibility Settings, users can define rules based on data values, user roles, permissions, or other factors to control the visibility of fields, sections, buttons, or other components within the application interface. This feature enables users to create dynamic and context-sensitive user experiences, displaying only the relevant information or functionality based on the specified conditions in Hubler applications.
Steps to apply visibility settings to the required conditions:
Click on the Default dropdown to select the field to which the condition needs to be applied.
Select the condition on which the visibility settings will depend.
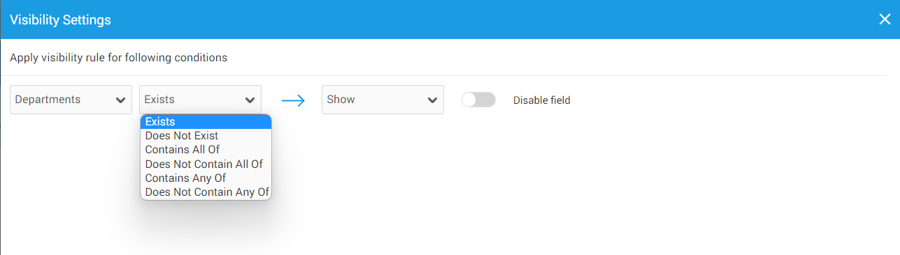
The other options will be automatically enabled based on the previously selected field and the required condition.

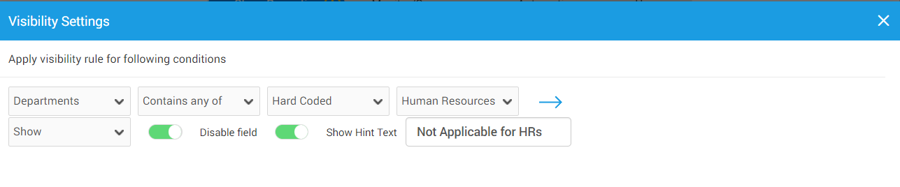
Once all the conditions are applied, the visibility of the field can be managed using the Show/Hide dropdown.

Additionally, a field can be made visible but disabled by using the Disable Field toggle button. A hint text can be provided to explain why the field is disabled for the applied conditions.
A new condition can be applied by clicking on the 'Add new condition' button on the left bottom corner of the canvas.
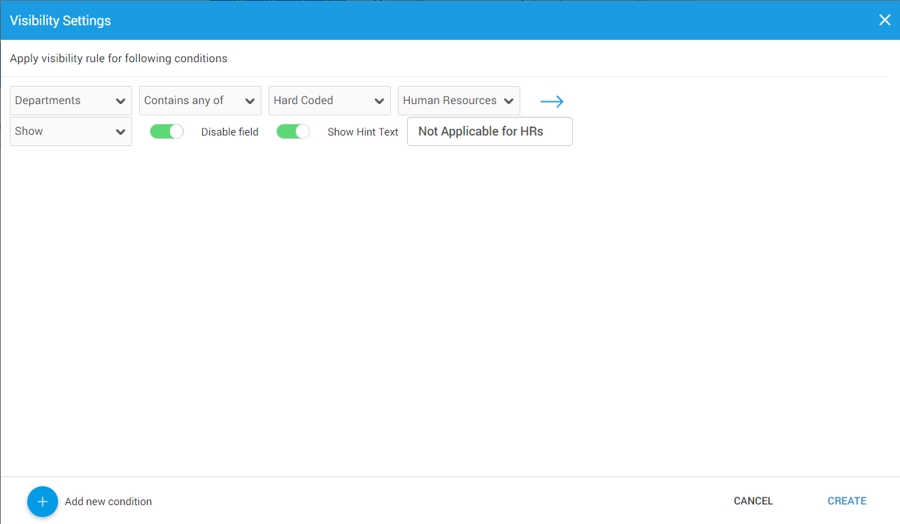
One done, click on CREATE to apply the conditions.
To go back, select the field from the right hand pane.